

This lesson is made with PSPX9
But is good with other versions.
© by SvC-Design
Materialen Download :
Here
******************************************************************
Materials:
Narah_Mask_1091.jpg
Leny-les314a.PspSelection
Leny-les314b.PspSelection
Leny-makeup72a.png
Leny-mistedl356a.png
Leny-rand.png
Leny-vrouw1464a.png
Riet_Tekst 884_ 170922 .psp
******************************************************************
Plugin:
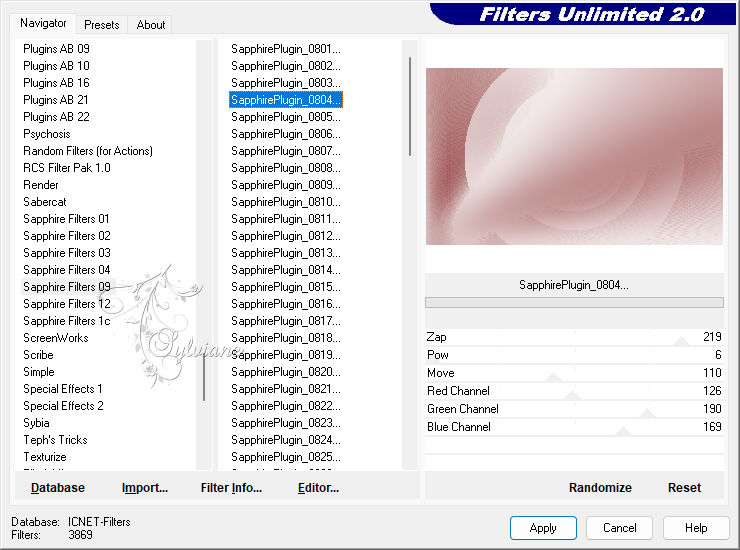
Plugin - Filter Unlimited 2.0. - Sapphire Filters 09 - SapphirePlugin_0804
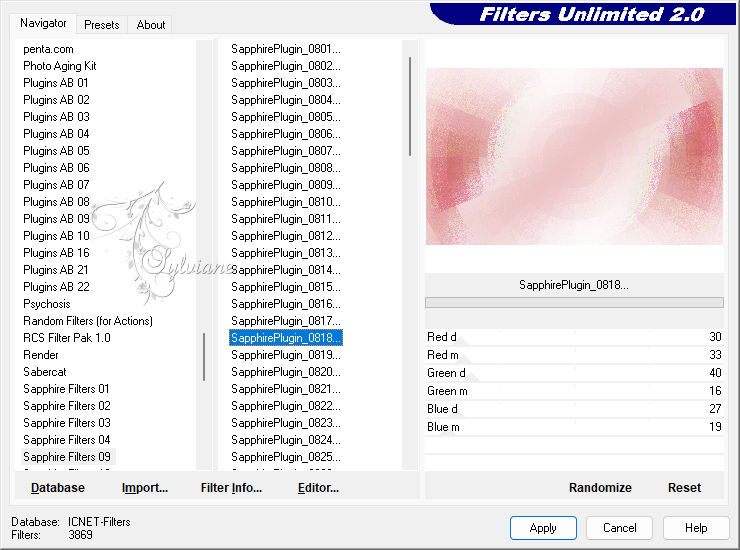
Plugin - Filter Unlimited 2.0. - Sapphire Filters 09 - SapphirePlugin_0818
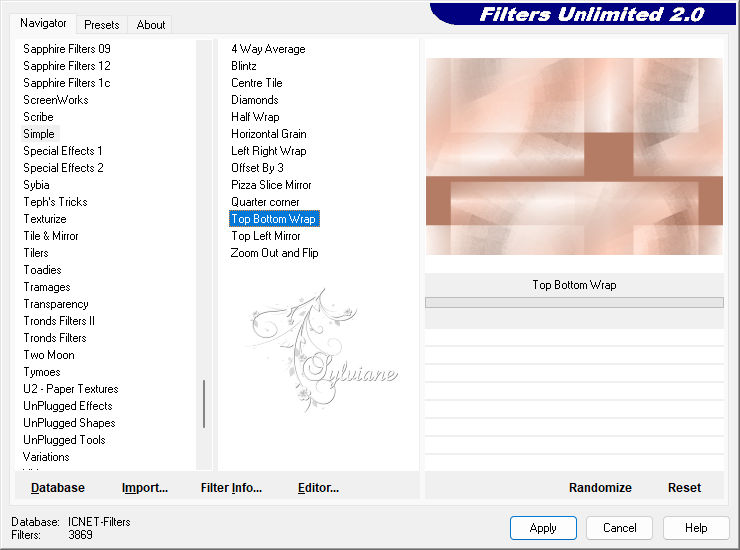
Plugin - Filter Unlimited 2.0. - Filter Simple - Top Bottom Wrap
Plugin - Filter AP[Lines] - Silverlinning - Dotty Grid
Plugin - MuRa's Meister - Perspective tiling
Plugin - Graphics Plus - Cross Shadow
******************************************************************
color palette
:

******************************************************************
methode
When using other tubes and colors, the mixing mode and / or layer coverage may differ
******************************************************************
General Preparations:
First install your filters for your PSP!
Masks: Save to your mask folder in PSP, unless noted otherwise
Texture & Pattern: Save to your Texture Folder in PSP
Selections: Save to your folder Selections in PSP
Open your tubes in PSP
******************************************************************
We will start - Have fun!
Remember to save your work on a regular basis
******************************************************************
1
Foreground color f6f2ef
Background color b47c65
2.
Foreground on Gradient Radial - Angle 0 - rep 12
Set the settings as below.
3.
Open a new transparent image of 750-450 pixels
Fill the image with the gradient
4.
Adjust - Blur - Gaussian Blur - Range 40
5.
Layers - Duplicate
6.
Plugin - Filter Unlimited 2.0. - Sapphire Filters 09 - SapphirePlugin_0804
7.
Set the Blend Mode to Luminance Legacy
8.
Layers - Duplicate
9.
Image - Mirror - Horizontal Mirror
Image - Mirror - Vertical Mirror
10.
Set the Blend Mode of this layer to Hard Light
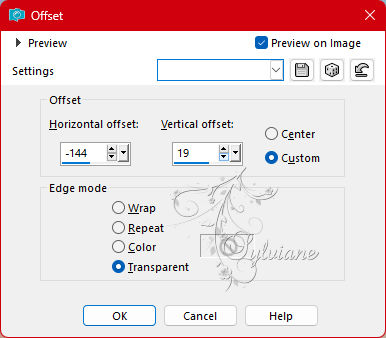
11.
Layers - merge - merge down
12.
The Blend Mode now remains at Luminance Legacy.
13.
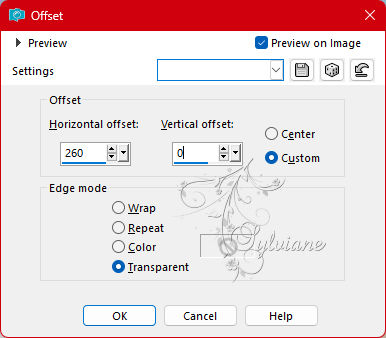
Plugin - Filter Unlimited 2.0. - Sapphire Filters 09 - SapphirePlugin_0818
14.
Edit - Repeat Filter Unlimited
15.
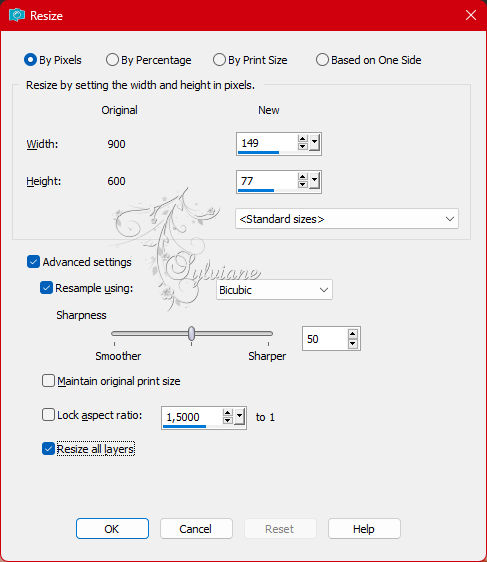
Layers - Merge - Merge all layers
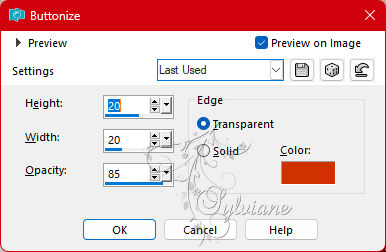
16.
Image – Add Borders –symmetric - 75 pixels - background color
18.
Layers - Duplicate
19.
Effects - Image Effects - Seamless Tiling

20.
Plugin - Filter Unlimited 2.0. - Filter Simple - Top Bottom Wrap
21.
Activate your magic wand - Set the Tolerance to 2 (With other colors you may have to increase the tolerance)
22.
Select the dark background color figure, as on the example below.

23.
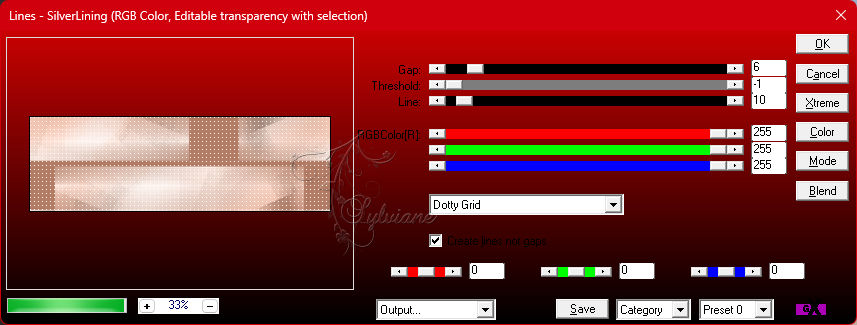
Plugin - Filter AP[Lines] - Silverlinning - Dotty Grid
24.
Selections – Promote selections to layer
25.
Selections - Select none
26.
Layers - Duplicate
27.
Image - Mirror - Vertical Mirror
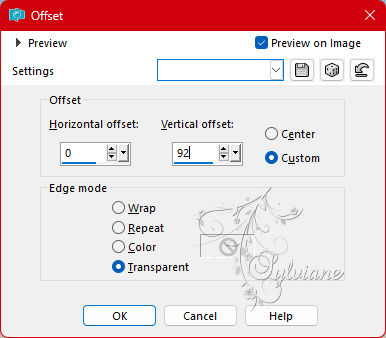
28.
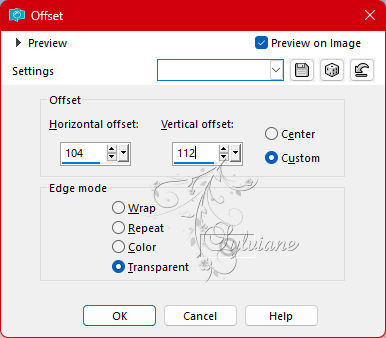
Effects - Image Effects – Offset
29.
Layers - merge - merge down
30.
Set the opacity to 80 and the Blend Mode to Burn
31.
Activate Background
32.
Layers – promote background layer
33.
Layers – Duplicate
34.
Layers - Arrange - Move up
35.
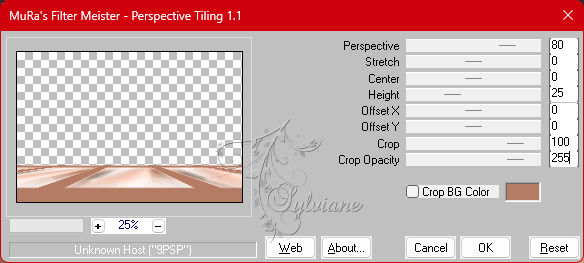
Plugin - MuRa's Meister - Perspective tiling
36.
Selections - Load/save selection - Load selection from disk - Leny-les314a

37.
Edit – Delete
38.
Selections - Select none
39.
Activate your magic wand and set the Tolerance back to 0
40.
Select with your magic wand the dark background color borders as on the example below.

41.
Edit - Delete.
42.
Selections - Select none
43.
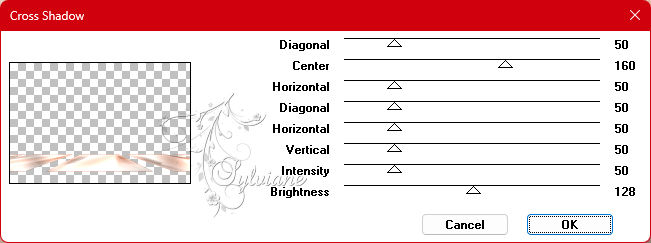
Plugin - Graphics Plus - Cross Shadow
44.
Effects - Edge Effects - Enhance more
45.
Activate Copy of Background
46.
Selections - Load/save selection - Load selection from disk - Leny-les314b

47.
Selections – Promote selections to layer
48.
Selections - Select none
49.
Set the Blend Mode to Multiply.
50.
Activate Copy of Background
51.
Plugin - Graphics Plus - Cross Shadow
Set Intensity to 30, the rest is fine.
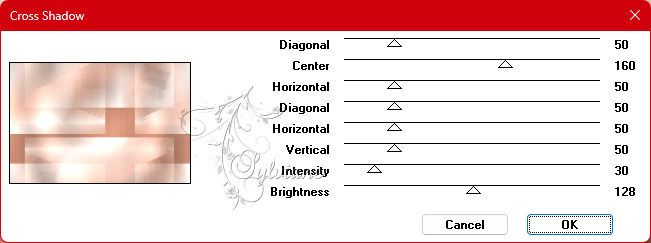
Stay on this layer
52.
Tube Leny-mistedl356a
Edit - Copy
Back to your image
Edit - Paste as new layer on your image
53.
Effects - Image Effects - Offset
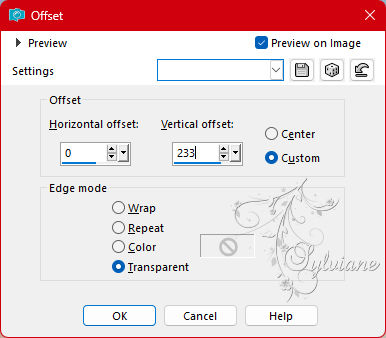
54.
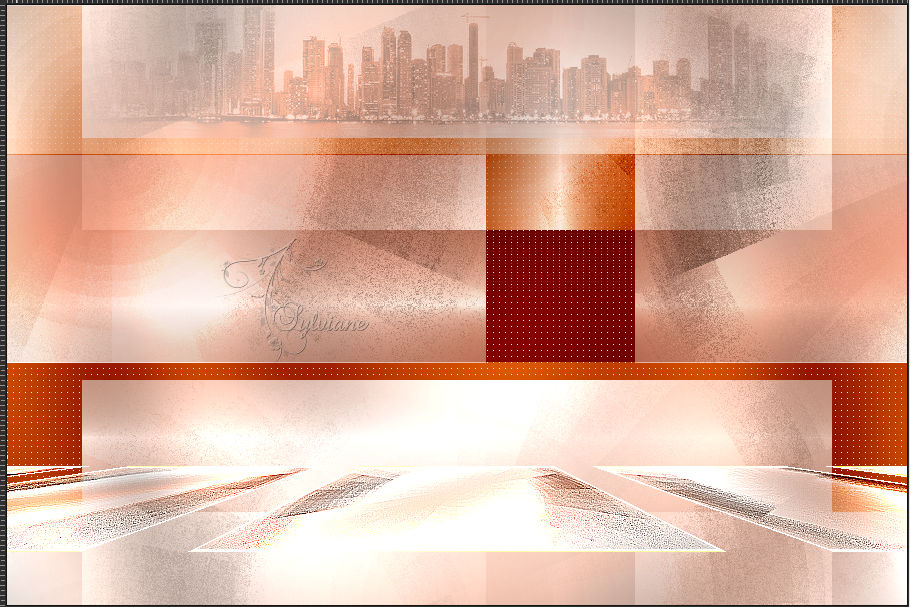
Set the Opacity to 28 and the Blend Mode to Luminance
You now have this
55.
Activate Copy of Background
56.
Layers - New raster layer
57.
Fill the layer with color ce3300
58.
Layers - New Mask Layer - From Image
Find mask Narah_Mask_1091

59.
Layers - Merge - Merge group
60.
Effects - Image Effects - Offset
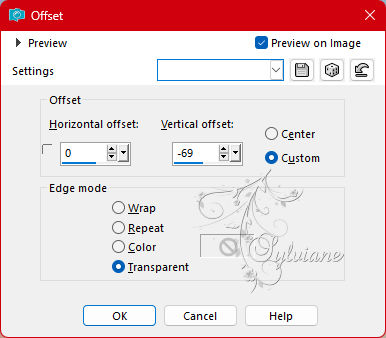
61.
Activate the top layer
62.
Tube Riet_Text 884_170922
Window - Duplicate
Click away the original tube and continue on the copy
Raster 2 is active, it has been colored by me and you can edit it after use. throw away
Edit - Copy
Back to your image
Edit - Paste as new layer on your image
63.
Remove the maker's name with lasso or eraser
64.
Effects - Image Effects – Offset
65.
Open Leny woman1464a
Edit - Copy
Back to your image
Edit - Paste as new layer on your image
66.
Move the tube to the left
67.
Effects - 3D Effects - Drop shadow
-12/-12/35/30 color:#000000
68.
Tube Leny makeup72a
Edit - Copy
Back to your image
Edit - Paste as new layer on your image
69.
Effects - Image Effects - Offset
70.
Effects - 3D Effects - Drop Shadow
-12/-12/25/20 color:#000000
71.
Edit - Copy merged
72.
Edit - Paste as new image
73.
Image - Resize width 149 pixels - Uncheck Lock aspect ratio
Set the height to 77 pixels - New resolution with Intelligence - Ok
74.
Continue on the small picture
Effects – 3D effects – Buttonize
Edit - Copy
Back to your image
Edit - Paste as new layer on your image
75.
Effects - Image Effects – Offset
76.
Layers – Duplicate
77.
Make the layer below the copy layer active
78.
Image - Rotate – rotate left
79.
Effects - Distortion Effects - Wind
Checked from Left - Wind Force 100
80.
Image - Rotate – rotate right
81.
Layers - Merge - Merge all layers.
82.
Image – Add Borders –symmetric - 2 Pixel - color:ce3300
Image – Add Borders –symmetric - 12 pixels - foreground color
Image – Add Borders –symmetric - 2 Pixel – color: ce3300
Image – Add Borders –symmetric - 6 pixels - foreground color
Image – Add Borders –symmetric - 2 Pixel – color: ce3300
83.
Selections - Select all
84.
Image – Add Borders –symmetric - 50 pixels - foreground color
85.
Effects - 3D Effects - Drop shadow
0/0/50/50 - Color ce3300
86.
Selections - Select none
87.
Image – Add Borders –symmetric - 4 Pixel – color: ce3300
88.
Tube Leny rim
Edit - Copy
Back to your image
Edit - Paste as new layer on your image.
The tube looks good right away.
89.
Place your name or watermark on the image.
Image - Resize 900 pixels width.
Save as jpg.
Back
Copyright Translation 2023 by SvC-Design